

 Eugene Pisarchick
Using TimeBase as Data Storage For IoT Devices


TimeBase is a high-performance time-series database developed by Deltix over the past 15 years, initially designed as a proprietary tool for handling market data. In recent years we have made steps to make it accessible to the open-source community by publishing TimeBase Community Edition, a version of TimeBase designed to be a general-purpose time-series database for anyone, along with a variety of tools and documentation for it.
This article is a part of that effort, aimed at being an example of using TimeBase to store and analyze data from an IoT device, in this case, an ESP32, storing weather data from our Minsk office and displaying it in TimeBase Web Admin application.
The Broad Strokes
We will be using an ESP32-based board, programmed in MicroPython, to read data from the AM2320 temperature and humidity sensor and the BMP180 temperature and barometric pressure sensor, both connected via an I2C bus. The data is then sent to the REST API endpoint of TimeBase WebAdmin, storing the data in an instance of TimeBase and making it available for monitoring in the TimeBase Web Admin application.
ESP32 Hardware
ESP32 is a series of low-cost microcontrollers with onboard Wi-Fi, Bluetooth, a dual-core or single-core 32-bit CPU and 320 KiB of RAM, and a similar amount of flash storage. All these features make it an incredibly popular option both for commercial projects that require Wi-Fi and/or Bluetooth and DIY enthusiasts.
Integrated Wi-Fi, 5$ price for a generic board from China, and enough RAM to perform a TLS handshake to access HTTPS endpoints make it a perfect choice for this small example project.
Other Hardware
As mentioned previously, we will be using two sensors connected via an I2C bus to monitor the weather data outside the Deltix Minsk office. The issue is that there is no place to put the station other than the rooftop terrace and the WiFi signal up there is not strong enough for the small ESP32 antenna and there is no header for an external antenna on the board. So the simplest solution is to have the sensors on a separate breakout board outside connected to the ESP via a twisted pair (for signal integrity) cable inside.

The board with ESP32 is very simple and has just the ESP board itself along with a couple of indicator LEDs and a 4-pin cable connector.
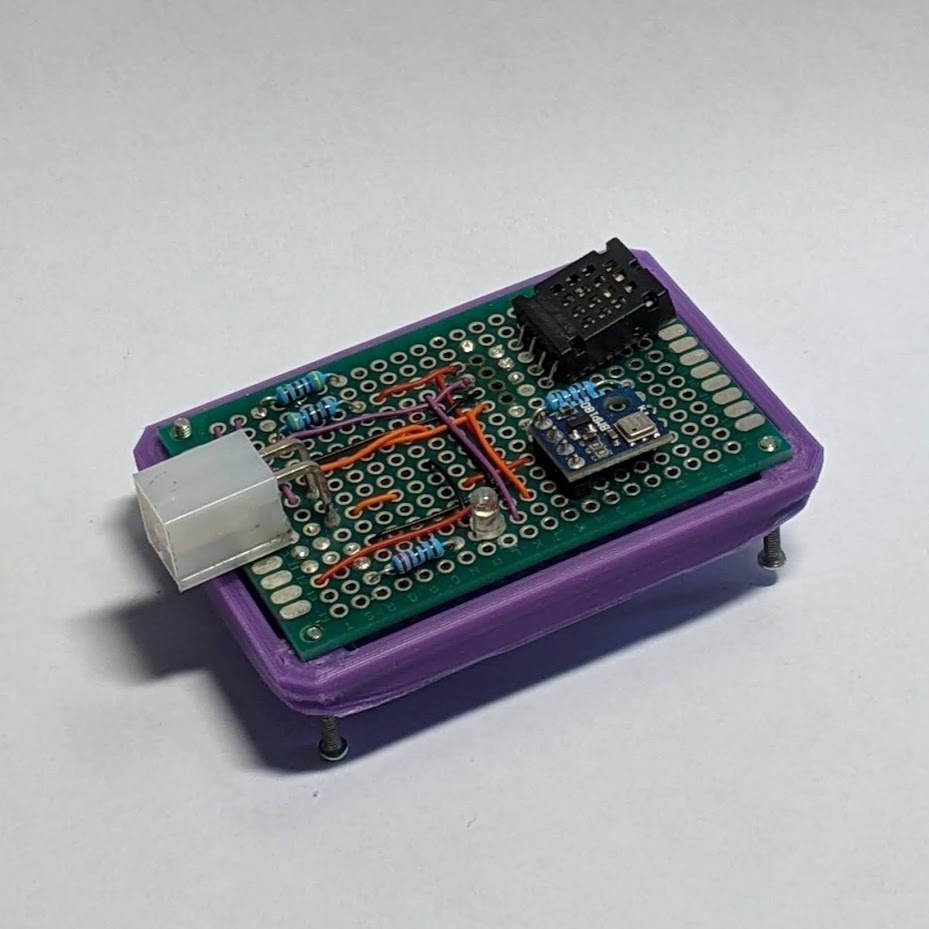
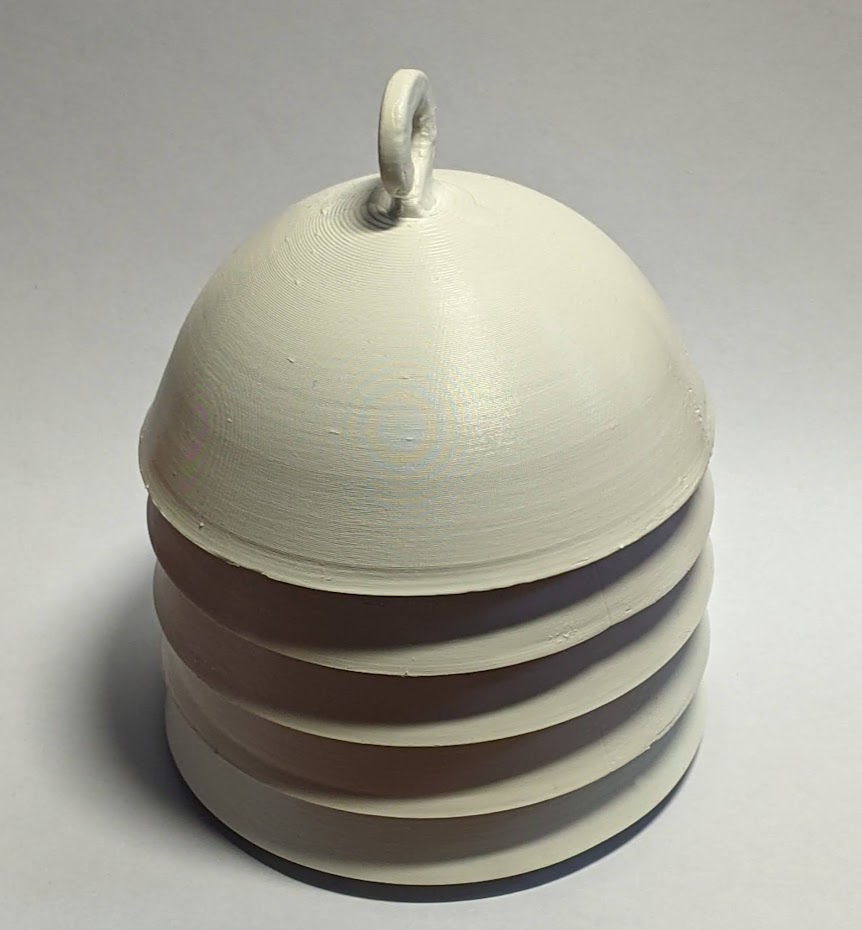
The other board has slightly more going on with two sensors connected to the I2C bus, with the corresponding pull-up resistors to get the signal across the long cable, and an indicator LED to see if the secondary board is connected. This board with the sensors is itself put in a 3D printed casing designed to provide shade from the sun as well as protection from the rain and snow while providing adequate airflow.
ESP32 Software
MicroPython is one of the many languages available for programming ESP32. It is a version of Python 3 designed to run on microcontrollers such as ESP32. Some of the features are missing due to memory and CPU restrictions but otherwise, it's a full Python environment along with upip package manager capable of installing third-party packages at runtime.
The software side is relatively simple once you get familiar with the environment and some of its quirks, so what it will do is:
1. Initialize the necessary ports and indicator LEDs;
2. Ensure the required sensors are available on the I2C bus;
3. Start a detached process on the co-processor for networking:
- Try to connect to Wi-Fi with the already stored settings;
- Failing that, start an access point, so that you are able to connect to it and change the Wi-Fi settings remotely and store them in non-volatile memory;
4. Wait for the Wi-Fi connection to be established;
5. Set the time using NTP;
6. Drop into the main loop:
- Read the data from the sensors, reboot if it keeps failing;
- Store it in a queue in non-volatile memory along with a timestamp;
- Try sending the contents of the queue to TimeBase WebAdmin REST API.
We will have a resilient system that should not lose any data, properly handle temporary network outages and radio interference, and, at worst, will get stuck in a bootloop if the sensors become unavailable.
Setting up the Development Environment
For programming the ESP we will be using Visual Studio Code with the Pymakr extension for uploading our code to the board and getting access to a Python interpreter running on our board. But first, we have to get the ESP ready for MicroPython by flashing the MicroPython bootloader. To do that, we will be using the esptool script. We can install esptool system-wide or in our local Python virtual environment:
python3 -m venv venv
# on Windows it's venv\Script\activate
. venv/bin/activate
pip3 install esptool
Then we can download the appropriate firmware from the MicroPython website and following their instructions flash it on the board:
# on Linux you might have to add yourself to the "uucp" or "dialout" group to be able to run these commands without "sudo"
# sudo usermod -a -G uucp $USER
esptool.py --chip esp32 --port /dev/ttyUSB0 erase_flash
esptool.py --chip esp32 --port /dev/ttyUSB0 write_flash -z 0x1000 esp32-20210902-v1.17.bin
If the process has been successful we will now have a board running a MicroPython interpreter and ready to accept our code. We can use the same commands later if the code we upload is so broken that we can't stop it and upload new code.
Now we need to install Node.JS for Pymakr to work. The steps required for that differ wildly even between Linux distros, so you will have to look it up on your own. If node -v returns at least v6.9.5 you should be all clear for installing the Pymakr extension from the extension marketplace.
After you've installed the extension and rebooted VS Code, you should see the global config or you can open it yourself through the Pymakr > Global settings in the command palette (Ctrl+P by default). (On Arch Linux I have had issues with opening the config file because Pymakr expects the VS Code config to be in ~/.config/Code and not "~/.config/Code - OSS", which can be fixed with a simple ln -s "~/.config/Code - OSS" ~/.config/Code)
The config file has a lot of options for connecting to different types of boards but we're only interested in a few of them:
    "auto_connect": true,
    ...
    "autoconnect_comport_manufacturers": [
      "Silicon Labs"
      ...
    ],
Which should be enough to get you connected to the board and present you with a MicryPython prompt

The Code
The code for the ESP itself can be found on GitHub. It should be relatively easy to understand if you're familiar with the Python syntax, but let's take a look at a few notable parts that might cause some issues or questions.
Code Outline
The code uploaded to the board consists of 5 Python files:
- boot.py handles setting up the environment for the main loop. It ensures the sensors are connected properly, sets up the WiFi process in a detached thread, starts up the WebREPL server, and hands the control off to the main.py.
- main.py is where the main loop is, which reads the saved queue from the non-volatile memory (NVM), reads the data from the sensors, saves the queue to the NVM, sends it off to TimeBase WebAdmin REST API, clears the queue, and starts the next iteration.
- config.py is a file that gets imported by boot.py and main.py. It acts as a simple configuration file where you can set the parameters for Wi-Fi, timings for different parts of the system, and the WebAdmin URL.
- am2320.py and bmp180.py are drivers for the sensors. You could download them at runtime using the upip module instead, but you can't edit the code of the relatively simple driver if you need to make some adjustments that way.
Threading and the Wi-Fi Process
Wi-Fi is handled by a separate function running on the second core of the dual-core ESP32 processor so that it can reconnect in case of interference.
In MicroPython the only way to start a process in a different thread seems to be using the low-level _thread Python module. It seems to not be particularly well implemented in MicroPython for ESP32, for example, the _thread.start_new_thread does not return a thread ID, but it works well enough for what we need, which is starting a detached function with no parameters - network_monitoring().
The function itself is very simple and it first sets up the WiFi with settings stored in NVM:
# get_wifi function reads the settings from NVM
# or if there are no settings in NVM gets the settings from config
SSID, PASS = get_wifi()
print("Connecting to ", SSID)
# This function activates the Wi-Fi module in client mode, note that
# trying to activate it in both client mode and access point mode will
# produce an exception
wlan.active(True)
wlan.connect(SSID, PASS)
And it then enters a loop that checks the connection status every second, logging the changes and changing the Wi-Fi status LED blink mode (slow blink (1Hz) - disconnected, solid glow - connected, fast blink (4Hz) - access point mode active):
while True:
    time.sleep(1)
    if wlan.isconnected():
        last_alive = time.time()
        if status == False:
            # Setting 1023 (100%) duty cycle is equivalent to setting it to solid glow
            wifi_status.duty(1023)
            print("WIFI connected!")
            status = True
            while True:
                try:
                    ntptime.settime()
                    time_tuple = time.gmtime()
                    time_str = "{}.{:02}.{:02} {:02}:{:02}:{:02}".format(*time_tuple[:6])
                    print("Set NTP time to ", time_str)
                    break
                except:
                    continue
    else:
        # If we can't connect to Wi-Fi for a while (1m by default)
        # then the settings are probably wrong and we need to enable
        # the access point to let us change the settings remotely
        if time.time() - last_alive > config.NO_WIFI_BEFORE_AP:
            break
        if status == True:
            wifi_status.duty(512)
            print("WIFI disconnected!")
            status = False
The rest of the function just restarts the Wi-Fi in Access Point mode to enable remote access with WebREPL.
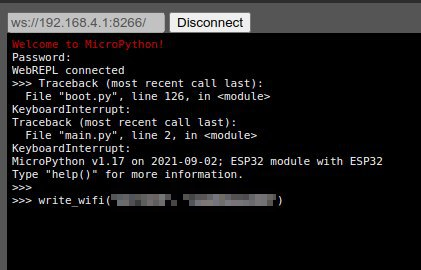
WebREPL
WebREPL is an interactive prompt available from a browser-based client which we use here to change the Wi-Fi settings remotely without having to flash the new settings onto the board.
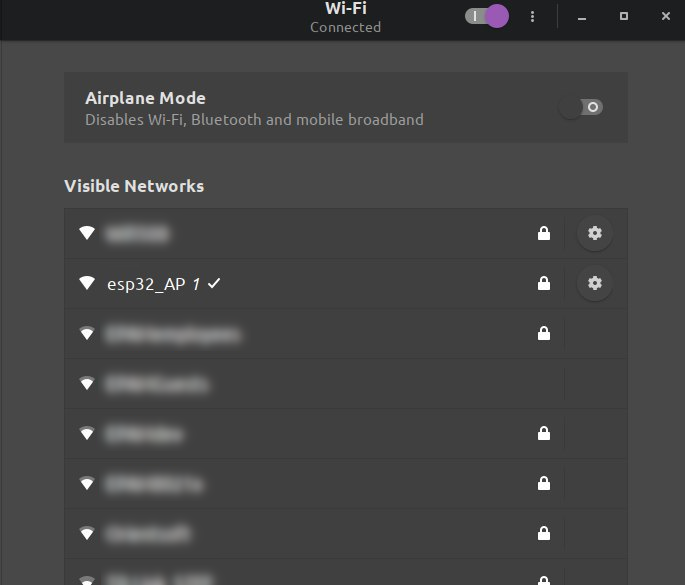
To access it we have to download the client from the GitHub repository and connect to the access point provided by the ESP32 when it can't connect to a known network (indicated by a fast blinking LED). The AP SSID and password are configured in the config.py file.
Now we can use the WebREPL client to connect to the board. Hit Ctrl-C a couple of times to interrupt the running processes and call the write_wifi function to update the WiFi settings, which also reboots the board.
Garbage Collection
MicroPython has a unique feature for microcontroller programming languages - garbage collection. By default, it's set to run when memory gets low, but that is fairly unpredictable and, to make sure the delays due to GC don't happen unexpectedly, we call gc.disable() at the beginning of main.py, and then we call gc.collect()
- before the requests (since sending HTTP, and especially HTTPS requests, requires a lot of RAM)
- and after reading and storing the sensor data (but only if we're running low on memory)
# Runs when over 75% of memory is used
if (gc.mem_alloc() >= gc.mem_free()*3):
    used = gc.mem_alloc()
    print("Running GC...")
    gc.collect()
    print("Freed ", used-gc.mem_alloc(), "B")
Interacting with TimeBase
To interact with TimeBase we will be using the REST API provided by WebAdmin, two endpoints in particular:
- /oauth/token to authenticate the requests using the default OAuth authentication flow to get and update temporary tokens
- /api/v0/{streamId}/{symbolId}/write to store a record.
TimeBase has other ways to store data, such as TickDB API, a native library available for Java, C#, Python, C++ and Go, that interacts directly with the TimeBase server without the need for WebAdmin's REST API. But before storing the data we first need to set our TimeBase instance up and configure it.
Setting Up TimeBase
TimeBase has a lot of deployment options available, but the easiest one is probably to use docker-compose. We start with a server with an IP address accessible to our IoT device, at least 2GB of RAM (TimeBase WebAdmin currently doesn't start if it can't allocate at least a gigabyte of memory), and an x86-64 processor (we do not currently provide ARM builds but you're free to try building it for arm64 yourself).
The most convenient option for me was a Google Cloud Platform e2-medium instance running Ubuntu 20.04, but this should work with any cloud hosting service or any self-hosted machine you might have.
Then we need to install Docker and Docker Compose (I prefer to install it through pip) on the machine. It should be relatively straightforward and we now have all we need to run the start file.
You can find the example docker-compose.yml on the TimeBase Documentation Portal. The only change we need to make before running is to change the memory limits for TimeBase, bringing them down from default 8 GB to something more sensible and changing the Timebase WebAdmin access port to port 80 in my case:
version: '3.9'
services:
  timebase:
    image: "finos/timebase-ce-server:latest"
    oom_kill_disable: true
    stop_grace_period: 5m
    ulimits:
      nofile:
        soft: 65536
        hard: 65536
    healthcheck:
      test: ["CMD", "wget", "--tries=1", "--spider", "http://localhost:8011/tb/ping"]
    environment:
      - JAVA_OPTS=
        -Xms2g
        -Xmx2g
        -DTimeBase.version=5.0
        -XX:+HeapDumpOnOutOfMemoryError
        -XX:HeapDumpPath=/timebase-home/timebase.hprof
        -Xlog:gc=debug:file=/timebase-home/GClog-TimeBase.log:time,uptime,level,tags:filecount=5,filesize=100m
    ports:
      - 8011:8011
    volumes:
      - "./timebase-home:/timebase-home"
    deploy:
      resources:
        limits:
          cpus: '2'
          memory: 9000M

  timebase-admin:
    image: "epam/timebase-ws-server:latest"
    environment:
      - JAVA_OPTS=
        -Xmx1g
        -Dserver.port=8099
        -Dserver.compression.enabled=true
        -Dserver.compression.mime-types=text/html,text/css,application/javascript,application/json
        -Dtimebase.url=dxtick://timebase:8011
    ports:
      - 80:8099
    depends_on:
      - timebase
We can start this manually by running docker-compose up or docker-compose start to start it in a detached mode. After downloading the containers, we should be seeing startup messages and we are now able to open the WebAdmin in the browser (on port 80 in this case)
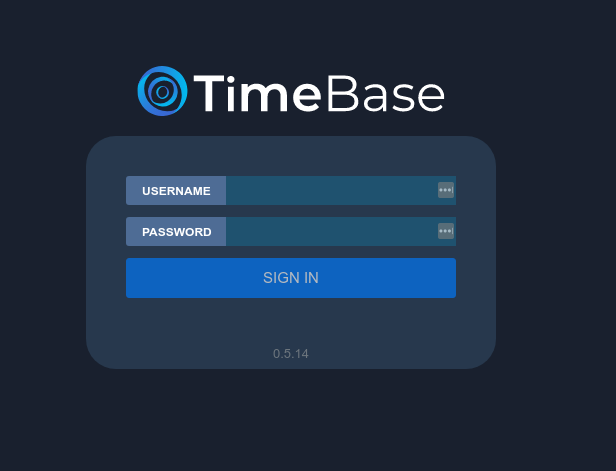
Using the default login credentials admin/admin (which you should probably change, see this article), you should be able to log in and access the WebAdmin dashboard.
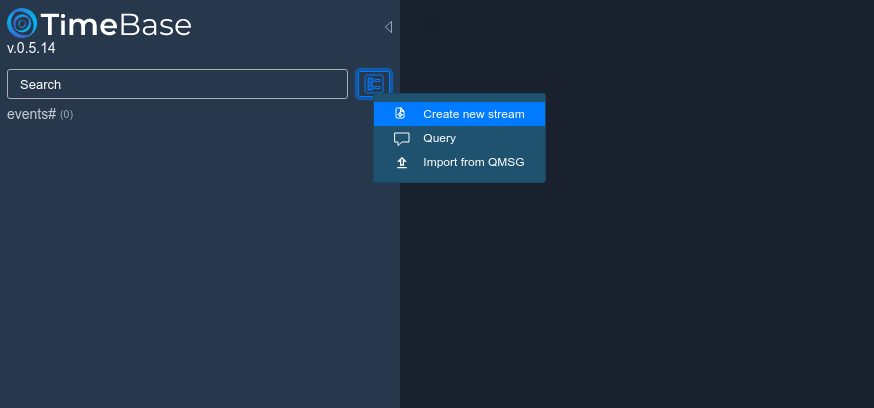
Data in TimeBase is stored in streams, you can think of them as tables in SQL databases. And just like tables, they have schemes that define what the data stored in a particular stream looks like. We can create a stream by running a query or by using the stream builder in WebAdmin.
Next, we build our schema by defining all the required classes and their respective fields. You can read more on how to define streams, as well as watch a tutorial video on the topic on the TimeBase WebAdmin documentation page.
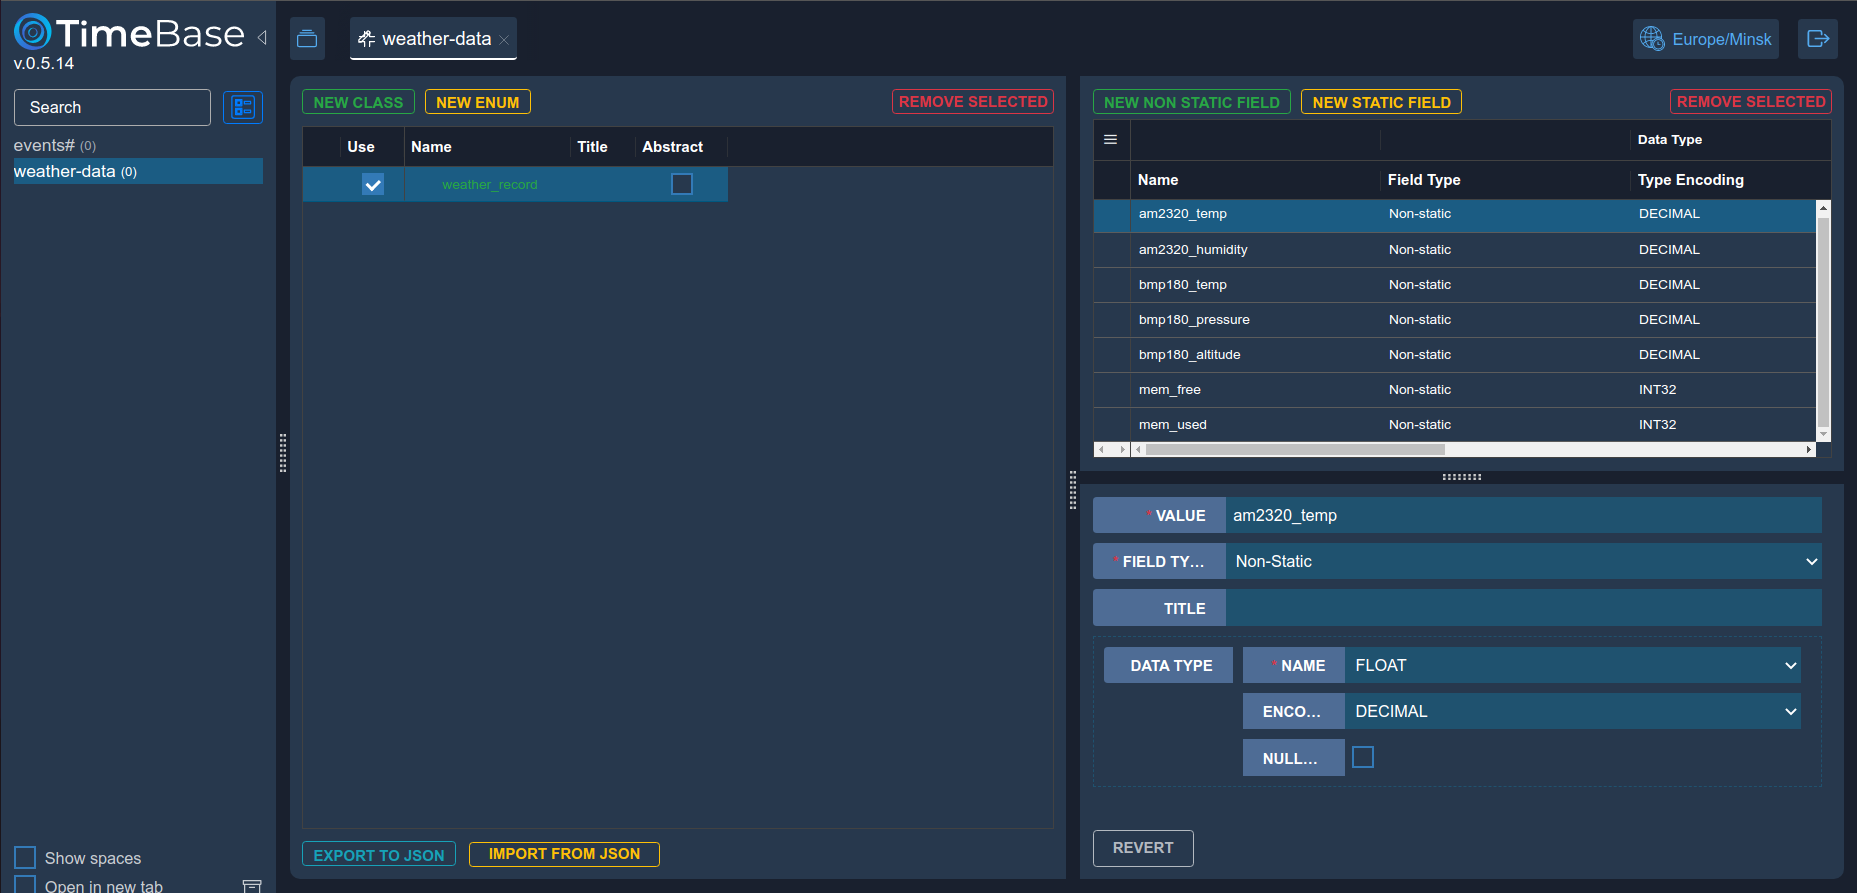
Hit CREATE after defining a schema. We have now created our stream schema and are ready to accept our messages.
Sending Messages
Now that we have our schema ready, we can send the messages from our ESP. As mentioned previously, we are going to batch them together not to use up the memory and send HTTP requests often. We're going to get the readings every 2 seconds and send them off to TimeBase every 10 seconds.
But before sending the messages we will have to get the token for them. The default flow for getting a token, from the point of view of a client device, is as follows
1. Send a POST request to /oauth/token with the credentials and the scope of the token.
2. Get the response containing a refresh token, an access token, and the access token lifetime.
3. Authorize all future requests by including the access token in the headers.
4. When the access token lifetime runs out, use the refresh token to get a new access token from /oauth/token.
To get the initial refresh token you can either use the user/password pair or a refresh token acquired other ways.
if token is None:
    payload = {
            'grant_type': 'password',
            'scope': 'trust',
            'password': config.TB_PASS,
            'username': config.TB_USER
    }
else:
    payload = {
        'grant_type': 'refresh_token',
        'refresh_token': token
    }
res = urequests.post(
    config.TB_HOST+'/oauth/token',
    data='&'.join([key+'='+value for key, value in payload.items()]),
    headers={
        'Authorization': 'Basic d2ViOnNlY3JldA==',
        'Content-Type': 'application/x-www-form-urlencoded'
    }
)
TimeBase admin supports other authentication methods such as signing each request cryptographically and using Auth0 and other OAuth providers. If you're planning to deploy WebAdmin in any sort of production capacity you should probably use one of those options for better security.
The messages themselves are just simple JSON arrays sent to the appropriate API endpoints, with the JSON structure corresponding to the schema defined for the stream.
res = urequests.post(
    '{}/api/v0/{}/write'.format(config.TB_HOST, config.TB_STREAM),
    json=[
        dict(record, **{
            '$type': 'weather_record',
            'symbol': 'esp'+ubinascii.hexlify(wlan.config('mac')).decode()[:4],
        })
        for record in stored_samples
    ],
    headers={
        'Authorization': 'bearer '+access_token,
        'Content-Type': 'application/json'
    }
)
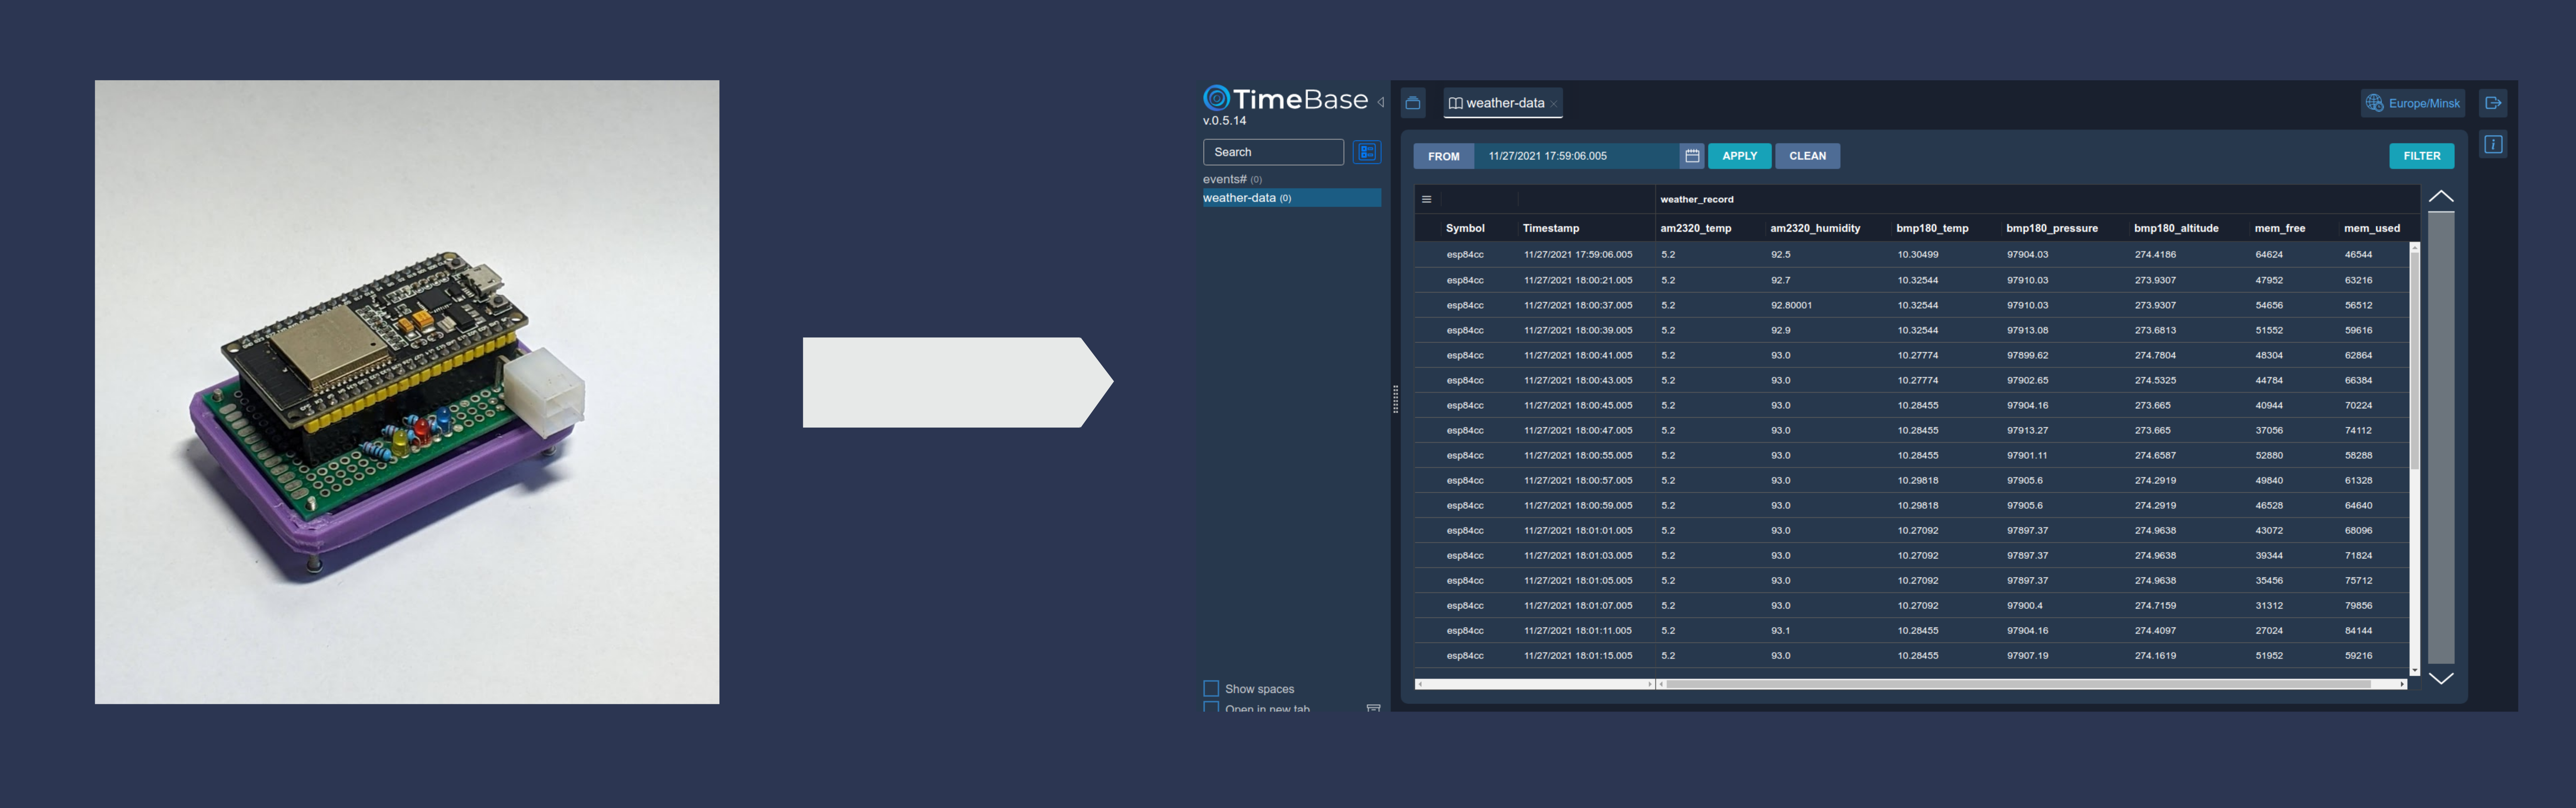
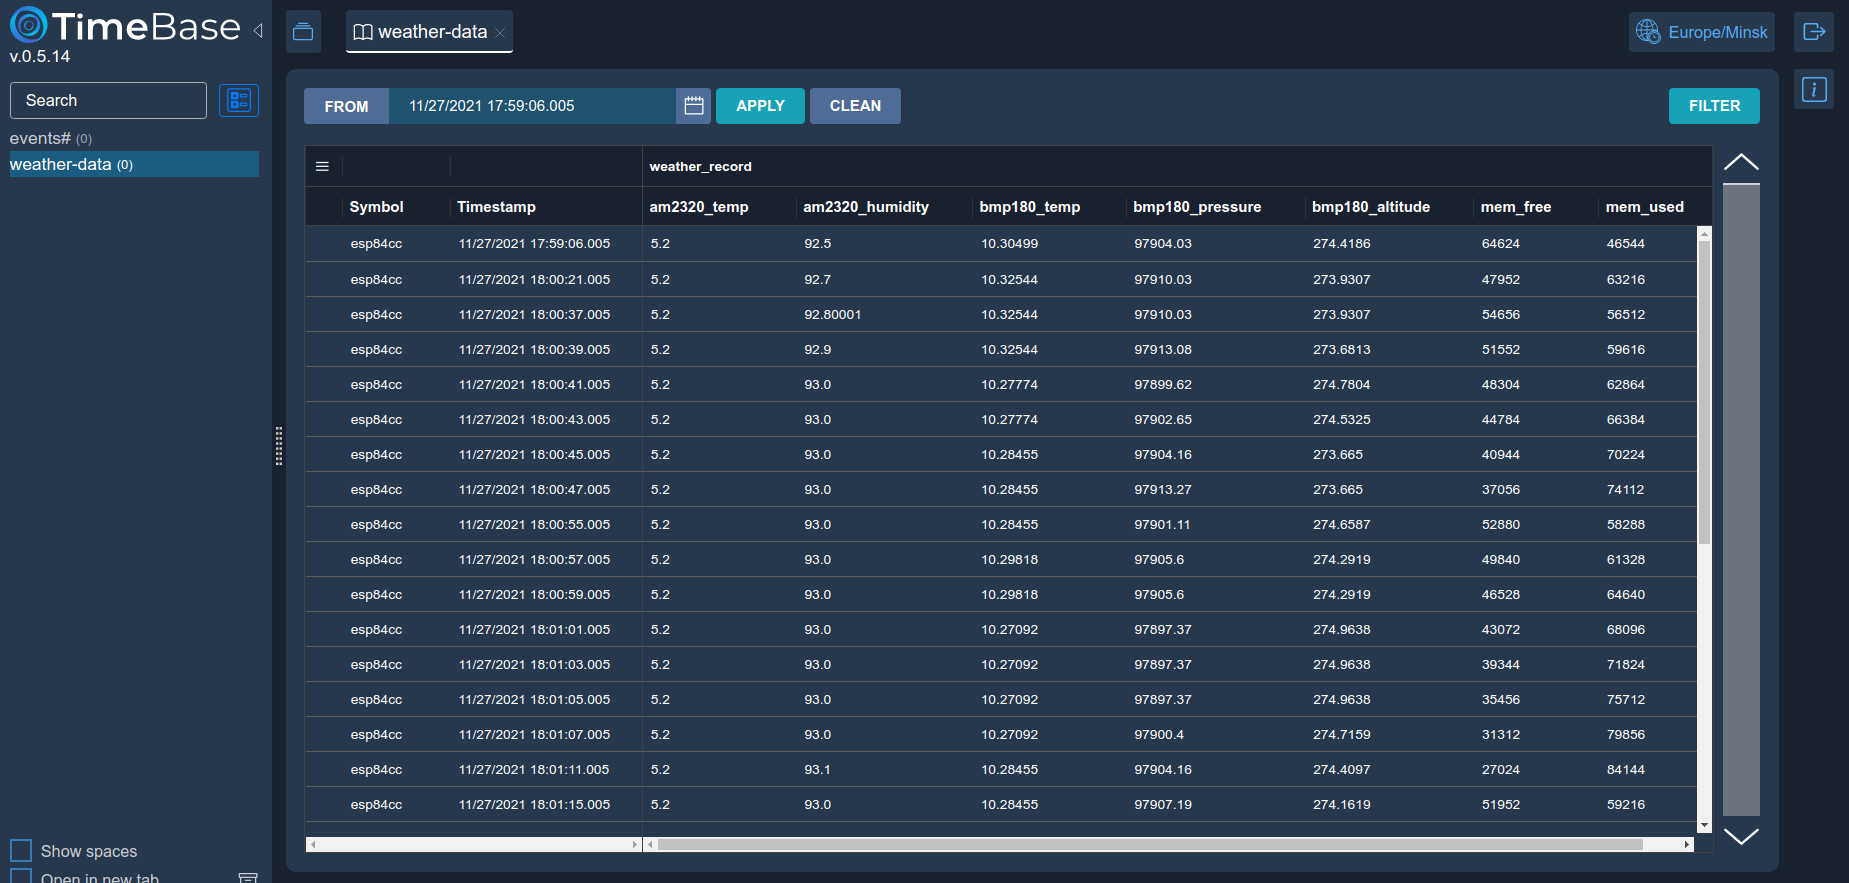
In our case, the samples are already stored in a similar format so very few changes are required, and we use the first 4 hex digits of the MAC address to identify a particular board as a separate symbol (the terminology comes from finance, where a "symbol" means a type of security, so originally you would have a single data source, for example, an exchange, providing data for various symbols such as BTCUSD, EURUSD and so on). We should now start seeing our data appearing in the WebAdmin monitoring view:
See Also
Eugene Pisarchick